Mold can pose serious risks to your home’s structure and your health. Preventing mold growth is far easier and more cost-effective than dealing with a full-blown infestation. By following effective strategies, you can keep your home clean, safe, and mold-free.

Control Indoor Humidity Levels

Maintaining proper humidity levels in your home is one of the most important steps in preventing mold. Mold thrives in environments with high moisture levels, so controlling humidity is key.

  • Ideal Humidity Range: Keep indoor humidity between 30% and 50%.
  • Use Dehumidifiers: Place dehumidifiers in damp areas such as basements or poorly ventilated rooms.
  • Ventilation: Ensure proper ventilation by using exhaust fans in bathrooms, kitchens, and laundry rooms.

Address Water Leaks Immediately

Water leaks create the perfect environment for mold to grow within as little as 24 to 48 hours. Regularly inspect your home for leaks and address them promptly.

  • Plumbing pipes under sinks and behind walls.
  • Roofs with missing or damaged shingles.
  • Windows with improper sealing.
  • Seal cracks or gaps around windows, doors, or foundations.
  • Fix leaking faucets or pipes immediately.
  • Clean gutters regularly to avoid water pooling near the foundation.

Improve Air Circulation

Proper airflow can prevent moisture buildup inside your home, reducing the risk of mold.

  • Move furniture slightly away from walls to allow air circulation.
  • Open windows periodically, especially after activities like showering or cooking that produce excess moisture.
  • Use ceiling fans to improve air movement during warmer months.

Regular Cleaning Practices

  • Bathrooms: Scrub tiles and grout using mold-resistant cleaners.
  • Kitchens: Clean grease buildup from cooking surfaces and ensure no water sits under sinks.
  • Basements/Attics: Remove clutter that restricts airflow and traps moisture.

Use Mold-Resistant Products

If you’re renovating or building a new space, consider using materials designed to resist mold growth.

Examples include: | Area | Recommended Products | |———————|————————————————–| | Drywall | Mold-resistant drywall panels | | Paint | Anti-microbial paints | | Insulation | Fiberglass insulation instead of organic-based |

These materials are specially designed to discourage fungal growth when exposed to moisture over time.

Inspect High-Risk Areas Frequently

  1. Basements
  2. Crawl spaces
  3. Bathrooms
  4. Under-sink cabinets
  5. HVAC systems

During inspections: – Look for discoloration on walls or ceilings (greenish-black spots). – Check for musty odors that could indicate hidden mold colonies.

Taking proactive measures like these will help identify potential issues early before they escalate into larger problems.

By adopting these strategies into your routine maintenance plan, you’ll create an environment that actively prevents mold growth while ensuring long-term protection for both your family’s health and the integrity of your home’s structure.

How a Mold Removal Company Can Protect Your Health and Well-Being

Mold growth in your home goes beyond being an unsightly nuisance; it can pose significant risks to your health and overall well-being. Understanding these effects is crucial for maintaining a safe and healthy living environment. Mold exposure can impact individuals differently, depending on the type of mold, the extent of exposure, and personal sensitivities.

Effective Black Mold Removal to Prevent Health Issues

  • Sneezing
  • Runny or congested nose
  • Itchy eyes, nose, or throat
  • Skin rashes
  • Wheezing or difficulty breathing
  • Exacerbation of asthma symptoms in asthma sufferers
  • Chronic sinus infections
  • Neurological Symptoms (in cases of toxic mold exposure):
  • Headaches or migraines
  • Fatigue or persistent tiredness
  • Difficulty concentrating (“brain fog”)

Individuals with weakened immune systems, respiratory conditions, or chronic illnesses are at higher risk for severe reactions.

Understanding the Long-Term Health Effects and Importance of Mold Removal Services in Hialeah FL

  • Chronic Respiratory Conditions: Long-term inhalation of mold spores can result in ongoing respiratory inflammation, which may contribute to developing chronic bronchitis.
  • Fungal Infections: Certain molds, such as Aspergillus, can cause fungal infections in people with compromised immune systems.
  • Toxic Effects: Exposure to molds that produce mycotoxins (e.g., Stachybotrys chartarum, often referred to as “black mold”) may lead to neurological symptoms like memory loss and mood changes over time.

How Mold Impacts Mental Well-Being

  • Increased Stress Levels: Living in an environment with visible mold growth or persistent damp odors can cause anxiety and stress for homeowners concerned about their property’s condition.
  • Mood Changes: Studies suggest that prolonged exposure to certain toxic molds might be associated with depression-like symptoms.

Reducing the Risk of Health Issues from Mold

  1. Use dehumidifiers in high-humidity areas like basements.
  2. Ensure proper ventilation in bathrooms and kitchens.
  3. Repair plumbing leaks immediately.
  4. Inspect roofing regularly for potential water entry points.
  5. Remove any visible mold using appropriate cleaning methods (e.g., soap and water for small areas).
  6. Dispose of porous materials like carpets if they have extensive contamination.
  7. Use air purifiers with HEPA filters that capture airborne spores.
Type of Mold Associated Health Risks Common Locations
Aspergillus Allergies, fungal infections Dust, air conditioning systems
Cladosporium Allergic reactions Wood surfaces, textiles
Stachybotrys (Black Mold) Mycotoxin-related illnesses Water-damaged materials

Taking proactive measures will help mitigate the risks associated with indoor mold while promoting a healthier home environment. Recognizing early signs of its presence is equally important as addressing underlying causes such as moisture intrusion or poor ventilation.

Essential Steps for Cleaning and Removing Mold Safely

Mold can be a persistent and hazardous issue in homes. When it comes to addressing a mold problem, safety is paramount to protect your health and prevent further contamination. Below are essential steps for cleaning and removing mold safely, ensuring that your efforts are effective and secure.

1. Assess the Situation Before You Start

  • Small Mold Patches: If the affected area is less than 10 square feet (e.g., spots on walls or ceilings), you may be able to handle it yourself using proper precautions.
  • Large or Widespread Growth: For areas larger than 10 square feet or if mold has spread into HVAC systems, professional remediation is recommended.
  • Hidden Mold: If you suspect mold behind walls or under flooring but cannot see it directly, consider hiring a mold inspection specialist.

2. Equip Yourself with Proper Protective Gear

  • N95 respirator mask to avoid inhaling spores.
  • Rubber gloves to protect your hands from irritants.
  • Safety goggles to shield your eyes from debris.
  • Long-sleeved clothing that can be washed or discarded after use.

3. Contain the Area

  • Close doors leading to other parts of your home.
  • Use plastic sheeting secured with tape over doorways and vents to limit spore spread.
  • Keep windows open in the work area for ventilation if weather conditions allow.

4. Remove Affected Materials

Material Action Required
Drywall Remove any visibly damaged sections entirely.
Soft Furnishings (e.g., carpets) Discard if deeply contaminated, as cleaning may not fully remove spores.
Wood Surfaces Scrub thoroughly with detergent; replace if rot is extensive.

Seal removed materials in heavy-duty garbage bags before disposing of them.

5. Clean Surfaces Thoroughly

  1. Scrub with water and detergent until mold stains are gone.
  2. Rinse thoroughly with clean water.
  1. Use a mixture of water and detergent but avoid over-saturating the material.
  2. Follow up with a diluted bleach solution (1 cup bleach per gallon of water) for added disinfection.

Always allow all surfaces to dry completely before restoring items or repainting walls.

6. Address Moisture Issues

  • Fix plumbing leaks immediately.
  • Improve ventilation by installing exhaust fans in bathrooms or kitchens.
  • Use dehumidifiers in areas prone to high humidity levels (e.g., basements).

7. Monitor for Recurrence

  • Check previously affected areas periodically for new signs of growth.
  • Continue maintaining low indoor humidity levels (30–50%) using hygrometers for accuracy.

Taking these steps ensures that you tackle existing mold effectively while minimizing health risks during cleanup efforts—ultimately creating a safer environment for everyone in your home.

Essential Steps for Cleaning and Removing Mold Safely

Mold removal must be approached with care to ensure both safety and effectiveness. If handled improperly, mold can spread further or pose risks to health. Below are detailed steps for safely cleaning and removing mold from your home.

1. Assess the Extent of the Problem

Before starting the removal process, it’s essential to evaluate the size and scope of the mold issue.
Small Areas: Patches under 10 square feet may be manageable for homeowners.
Larger Areas: For areas above this size or where mold has spread within walls or HVAC systems, a professional remediation specialist is recommended.

2. Wear Proper Personal Protective Equipment (PPE)

Safety is key when handling mold to avoid respiratory irritation or skin reactions. Proper protective gear includes:
– N95 respirator mask or equivalent
– Non-porous gloves (e.g., nitrile or rubber gloves)
– Safety goggles without ventilation holes
– Long-sleeved clothing that can be washed or discarded after use

3. Isolate the Affected Area

Prevent mold spores from spreading to other parts of your home by sealing off the contaminated area with heavy-duty plastic sheeting and duct tape. Shut doors and windows in adjacent areas during cleanup.

4. Address Moisture Issues First

Mold thrives in damp environments, so eliminating moisture sources is critical:
– Fix leaks in plumbing, roofs, or windows immediately. – Use a dehumidifier to reduce indoor humidity levels below 50%.

Without addressing moisture problems, mold is likely to return even after cleaning.

5. Choose Appropriate Cleaning Agents

Material Cleaning Method Notes
Non-Porous Surfaces Scrub with water and detergent Avoid using bleach unless absolutely necessary as it may damage surfaces
Porous Materials Remove and dispose (e.g., drywall, carpet) Porous materials often retain spores even after cleaning
Wood Sand lightly if necessary; clean with vinegar or detergent solution Ensure wood is thoroughly dry before sealing

Tip: Avoid mixing chemicals like bleach and ammonia as they produce toxic gases.

6. Clean Up Safely After Removal

Once visible mold is removed from surfaces: – Use a HEPA vacuum cleaner to clean up any residual spores in the area. – Dispose of contaminated materials (e.g., rags, sponges) in sealed plastic bags. – Wash hands thoroughly after completing cleanup.

7. Monitor for Recurrence

After remediation efforts are complete: – Inspect previously affected areas regularly for signs of recurring growth. – Keep humidity levels low using air conditioners, fans, or dehumidifiers. – Consider installing moisture sensors in high-risk areas like basements and attics.

By following these steps methodically, you can remove existing mold safely while minimizing risks of exposure or recurrence over time.

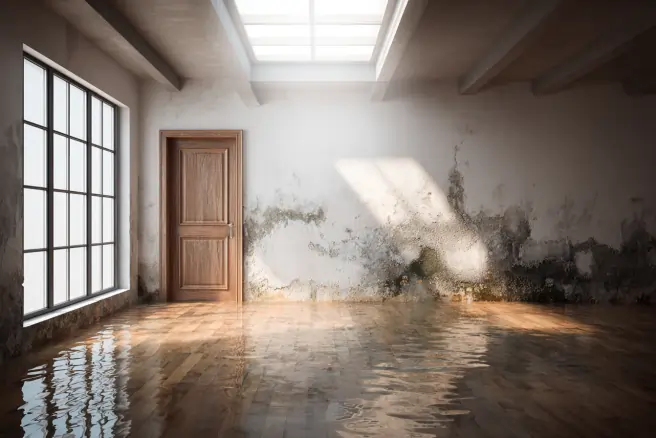
What to Do to Prevent Mold Growth After a Flood or Water Damage Incident

Mold can grow quickly in the aftermath of a flood or water damage, often within 24 to 48 hours. Taking prompt and effective steps is essential to prevent mold growth and protect your home and health. Here’s a comprehensive guide on how to address the situation and minimize the risks associated with mold development.

Assess the Extent of Water Damage

After any flooding or water damage incident, the first step is understanding the scope of the problem. A thorough inspection helps you plan your remediation efforts effectively.

  • Check for standing water: Look for any areas where water has pooled, especially in basements, crawl spaces, or low-lying sections of your home.
  • Inspect hidden areas: Pay attention to less obvious locations such as behind walls, under carpets, or inside HVAC systems.
  • Document damage: Take photographs and note affected areas for insurance claims or consultations with professionals.

Prioritize Drying Your Home

Moisture control is critical in preventing mold growth post-flooding. The faster you can dry out affected materials and spaces, the better.

  1. Use pumps or wet vacuums designed for this purpose.
  2. Dispose of wastewater away from your home’s foundation.
  3. Open windows and doors when weather permits.
  4. Use fans strategically to promote air circulation in damp areas.
  5. Dehumidifiers help reduce moisture levels in enclosed spaces such as basements and bathrooms.
  6. Monitor humidity levels; aim for a relative humidity below 50%.
  7. Carpeting, insulation, and upholstered furniture are often unsalvageable after prolonged exposure to water.

Clean Surfaces Properly

Even after drying an area thoroughly, it is important to clean surfaces that were exposed to water to remove any mold spores that may have started growing.

  • Hard surfaces: Wipe down walls, floors, tiles, and countertops with a solution of detergent and water.
  • Porous materials: Items like drywall may need removal if they appear stained or deteriorated.
  • Disinfect when appropriate: Use products recommended by professionals (such as solutions containing bleach) but exercise caution when applying these chemicals indoors.

Repair Structural Issues Promptly

Area Affected Recommended Action
Walls & Flooring Replace damaged drywall; refinish wood
Roofing Inspect for leaks or missing shingles
Plumbing Repair burst pipes; inspect joints

Delayed repairs increase vulnerability not only to mold but also other complications like pest infestations or rot.

Prevent Future Water Intrusions

  • Install sump pumps in vulnerable basements.
  • Ensure gutters direct rainwater away from your foundation.
  • Seal cracks around windows and doors with caulk or weatherstripping.

By taking these steps immediately following a flood incident—or better yet during cleanup—you significantly reduce long-term risks associated with mold infestation while maintaining safer living conditions.

Finding the Best Hialeah FL Mold Removal Company: When and Why It’s Necessary

Mold testing is a critical step in identifying and addressing mold issues in your home or workplace. Even if visible mold is not apparent, hidden colonies could compromise air quality and lead to health risks. Knowing when and why mold testing is necessary will help maintain a safe environment for everyone: https://evercleanmoldremoval.com/locations/hialeah-fl-mold-remediation

Below, we explore the key aspects of mold testing, including its importance, methods, and actionable tips.

Why Mold Testing Is Important

  • Protects Health: Prolonged exposure to mold can cause respiratory issues, allergic reactions, or aggravate asthma symptoms.
  • Pinpoints Hidden Mold: Not all mold growth is visible. It may be lurking behind walls, under flooring, or within your HVAC system.
  • Prevents Structural Damage: Early detection through testing can prevent costly damage caused by unchecked mold growth.
  • Monitors Air Quality: Mold tests assess indoor air quality and measure spore concentration levels.

When Should You Consider Mold Testing?

  1. After Water Damage Incidents
    Flooding or leaks create an ideal environment for mold growth. Even after drying out affected areas, it’s critical to test for any lingering spores.
  2. Unexplained Health Symptoms
    If occupants experience persistent coughing, sneezing, headaches, or skin irritation without a clear cause, consider testing for hidden molds.
  3. Buying or Selling Property
    Conducting a thorough inspection during real estate transactions can avoid potential disputes or surprises later.
  4. Visible Spots or Musty Odors
    Dark stains on ceilings or walls and persistent earthy smells often indicate microbial activity that requires investigation.
  5. High Humidity Levels Indoors
    Homes with humidity levels above 60% provide favorable conditions for spore proliferation.

Types of Mold Testing Methods

Test Method Description Best For
Air Sampling Measures spore concentration in indoor air Assessing overall air quality
Surface Testing Collects samples from specific surfaces Identifying visible contamination
Bulk Testing Examines materials like drywall for embedded spores Understanding deep contamination
Culture-Based Testing Grows collected molds in a lab to identify species Determining specific types of fungi

Tips for Accurate Mold Testing

  • Hire certified professionals who use accredited laboratories for analysis.
  • Avoid over-the-counter DIY kits as they may not provide comprehensive results.
  • Test multiple areas of your home rather than relying on one sample.
  • Conduct follow-up tests after remediation efforts to confirm successful removal.

Mold testing is an essential component of maintaining a healthy indoor environment. By knowing when it’s necessary and employing proper methods, you can keep your space safe from potential hazards caused by undetected molds.

Everything You Need to Know About Inspecting and Repairing Leaks to Avoid Mold

One of the most effective ways to prevent mold growth in your home is by addressing leaks promptly and thoroughly. Leaks create moist environments, which are ideal conditions for mold to thrive. Below, we cover everything you need to know about identifying leaks, inspecting problem areas, and making necessary repairs to avoid mold development.

Common Areas Prone to Leaks

  • Roof: Damaged shingles, flashing issues, or clogged gutters can lead to roof leaks.
  • Plumbing Systems: Burst pipes, faulty connections, and worn-out seals around sinks, showers, and toilets are common culprits.
  • Windows and Doors: Improper sealing or deteriorating weatherstripping allows water intrusion.
  • Basements and Crawl Spaces: Poor drainage systems or cracks in foundation walls may cause water seepage.
  • Appliances: Dishwashers, washing machines, refrigerators with water dispensers, and HVAC systems can develop leaks over time.

Routine inspection of these areas is critical for early detection.

Signs of a Leak: What to Look For

  • Water Stains: Brownish-yellow discoloration on walls or ceilings.
  • Musty Odors: Persistent damp smells often signal hidden moisture.
  • Peeling Paint or Wallpaper: Excessive moisture causes these materials to lose adhesion.
  • Increased Water Bills: A sudden spike might indicate an undetected plumbing leak.
  • Visible Dripping or Puddles: Obvious signs of active water intrusion.

Conduct regular checks in high-risk areas like under sinks, behind appliances, and near windows.

Steps for Inspecting Leaks

  1. Examine walls, ceilings, floors, and pipes for stains or visible moisture.
  2. Check insulation in attics or basements for dampness.
  3. Confirm that caulking around tubs, sinks, windows, and doors is intact.
  4. Low pressure could indicate a hidden pipe issue within the system.
  5. For hard-to-see leaks inside walls or flooring materials.
  6. Ensure downspouts direct water away from your home’s foundation.

Best Practices for Repairing Leaks

  1. Address small cracks with waterproof sealants like silicone caulk.
  2. Replace worn-out weatherstripping on windows/doors as needed.
  3. Repair damaged roof shingles promptly; consider professional help if extensive damage exists.
  4. Tighten loose pipe connections using adjustable wrenches; replace corroded sections entirely if necessary.
  5. Install drainage solutions like French drains near foundations prone toward pooling rainwater runoff.

For widespread damages (e.g., burst pipes), consult licensed professionals who can handle complex plumbing tasks safely without exacerbating risks tied directly towards future recurrence-related molds formation cases arising afterward too frequently unchecked prolonged intervals passing unnoticed homes unnoticed mostly-publicly-speaking anyhow longer durations overall time spans involved initially tracking back.


Black mold in the corner of room wall stock photo

Mold remediation is an essential process for maintaining a safe and healthy indoor environment. Whether you’re dealing with minor mold growth or a significant infestation, understanding how mold removal works ensures the issue is handled effectively. This guide explains the preparation, treatment, and best practices for addressing mold to prevent recurrence.

Preparing for Mold Remediation

Before jumping into the removal process, proper preparation lays the foundation for effective remediation.

  1. Identify areas of visible mold growth (walls, ceilings, floors, HVAC systems).
  2. Check for hidden mold in areas like under carpets or inside air ducts.
  3. Measure the affected area to determine whether it requires professional intervention (typically more than 10 square feet).
  4. Wear appropriate personal protective equipment (PPE), such as gloves, goggles, and N95 respirators.
  5. Seal off contaminated areas using plastic sheeting to prevent spores from spreading during cleanup.
  6. Address Water Problems First
    Mold thrives in damp environments. Fixing leaks or eliminating sources of moisture is critical before starting remediation.

The Mold Removal Process

The treatment approach depends on the severity of contamination and type of surface affected.

  1. Containment
    Create barriers around affected zones to isolate mold spores from spreading during cleaning efforts.
  2. Porous materials like drywall or carpet heavily infested with mold often need to be discarded completely.
  3. Non-porous surfaces (e. g. , glass or metal) can typically be cleaned with specialized solutions.
  4. Cleaning and Disinfection
    Use EPA-registered cleaning agents designed for killing mold spores effectively:
  5. Bleach solution:1 cup bleach per gallon of water (for hard surfaces only).
  6. Commercial products labeled safe for use against fungi and bacteria.
Material Type Recommended Action Notes
Porous materials (wood) Replace if heavily damaged Wood absorbs moisture easily; inspect thoroughly
Non-porous surfaces Scrub with detergent + disinfectant Ensure surface is completely dry post-cleaning
  1. DryingUtilize dehumidifiers, fans & ventilation systems always ensuring space dries quickly afterwards .

Effective Solutions from a Mold Removal Company Hialeah, FL for Safe Mold Growth Management

Mold growth can appear in various forms and locations within your home or workplace, often requiring specific approaches to address the issue effectively. Understanding how to handle such situations safely while minimizing risks is essential for protecting both your property and health.

Assessing the Severity of Mold Growth

  1. Small patches of mold (less than 10 square feet) on non-porous surfaces such as tiles or glass can typically be addressed with household cleaning products.
  2. Wear gloves, goggles, and a mask to avoid direct exposure to mold spores.
  3. When mold covers larger areas (10–100 square feet) but hasn’t penetrated deep into walls or structural components, consider using specialized cleaning solutions like commercial mold removers.
  4. Ventilate the area thoroughly during cleanup to reduce airborne spores.
  5. When mold spreads across significant areas (over 100 square feet), invades porous materials like drywall, or is caused by severe water damage, professional remediation services may be necessary.
  6. Extensive infestations often require containment measures and advanced removal techniques to avoid cross-contamination.

Mold on Drywall

  • Porous materials like drywall are highly susceptible to mold growth when exposed to moisture over time.
  • If the infestation is minor, clean it with a mixture of water and detergent; however, significant growth often requires replacing the affected portion of drywall entirely.

Bathroom Mold

  • High humidity makes bathrooms particularly prone to mold on grout lines, caulking, or ceilings. Use a bleach solution or a commercial cleaner specifically designed for bathroom molds.
  • Install proper ventilation systems like exhaust fans to prevent regrowth.

Attic Mold

  • Poor insulation or ventilation in attics can lead to condensation issues that promote mold growth. Address the root cause by improving airflow or repairing roof leaks before treating the affected areas with antimicrobial sprays.

HVAC System Mold

  • If you detect musty odors coming from your air ducts, it could indicate fungal contamination in your HVAC system. | Step | Action | |——————-|————————————————————| | Turn off HVAC | Prevent further spore distribution by shutting off airflow. | | Inspect Ducts | Check for visible signs of mold inside ductwork. | | Professional Help | Hire experts trained in cleaning contaminated HVAC systems.

Safe Cleanup Practices

  • Personal Protective Equipment (PPE):Always wear gloves, protective eyewear, N95 masks, and disposable coveralls when handling molds directly.
  • Containment:Seal off affected areas using plastic sheeting with taped edges before beginning remediation work.
  • Proper Disposal:Place contaminated materials into sealed bags before disposing them according to local waste regulations.
  • Post-Cleanup Testing:Use moisture meters or hire professionals for air-quality assessments after remediation efforts are complete.

By tailoring your approach based on the type and severity of growth while adhering strictly to safety protocols, you can mitigate risks effectively without spreading contamination further within your living spaces.

Expert Hialeah, FL Mold Remediation: When to Call Professionals

Dealing with mold growth in your home or workplace can be a challenging task. While minor mold issues may sometimes be handled with DIY solutions, there are situations where calling professional mold remediation services is essential. Understanding when to involve experts can save you time, protect your health, and prevent the problem from worsening.

Signs You Need Professional Mold Removal Services

  • Widespread Mold Growth: If mold covers an area larger than 10 square feet (approximately a 3-foot by 3-foot patch), it’s time to call professionals. Larger infestations require specialized equipment and expertise to remove safely.
  • Recurrent Mold Problems: If you’ve attempted DIY removal only for the mold to return, this could indicate an underlying issue such as persistent moisture or hidden growth. Experts can identify and address these root causes.
  • Strong Musty Odors: Persistent musty smells, particularly in areas where no visible mold is present, could indicate hidden colonies behind walls, under flooring, or in HVAC systems that require professional detection and treatment.
  • Health Issues: Prolonged exposure to mold can trigger allergies or respiratory problems such as asthma or sinus infections. If you or your family experience unexplained health concerns linked to poor air quality, it’s advisable to consult professionals.
  • Water Damage: After significant water damage from flooding, leaks, or burst pipes, it’s likely that mold will begin growing within 24–48 hours if not properly addressed by trained specialists.

Benefits of Hiring Professionals

Benefit Description
Thorough Assessment Professionals conduct detailed inspections using technology like moisture meters and infrared cameras to locate hidden mold colonies.
Safe Removal Techniques Experts use containment measures such as negative air pressure systems to prevent spores from spreading during removal processes.
Specialized Equipment Industrial-grade HEPA vacuums, dehumidifiers, and antimicrobial treatments ensure efficient cleanup and long-term prevention of recurrence.
Preventative Measures Beyond removing existing growths, professionals address underlying causes (e.g., leaks) that contribute to favorable conditions for future infestations.

Situations Requiring Emergency Professional Assistance

Some scenarios demand immediate intervention due to health risks or structural concerns:
1.Black Mold (Stachybotrys): Toxic black mold requires expert handling due to its potential health risks. 2.Extensive HVAC Contamination: When HVAC systems are infested with mold spores, professional cleaning ensures the system doesn’t spread contaminants throughout the property. 3.Compromised Building Materials: Advanced infestations may cause structural damage requiring both remediation and repairs.

How Professionals Ensure Effective Mold Remediation

The process experts follow includes several comprehensive steps designed for thorough treatment:
1. Inspection & Testing – Identifying the type of mold and determining the scope of contamination. 2. Containment – Isolating affected areas using barriers like plastic sheeting. 3. Air Filtration – Deploying HEPA filters during remediation processes. 4. Safe Disposal – Removing contaminated materials according to EPA guidelines. 5. Restoration – Repairing damaged areas post-removal.

By recognizing when professional help is needed and understanding their approach, you can ensure the longevity of your home’s safety while protecting occupants’ health effectively.

Black mold in the corner of room wall stock photo

Step-by-Step Guide to Black Mold Removal Hialeah, FL: Diagnosing and Solving Your Mold Problem

Identifying and addressing a mold issue requires a systematic approach to ensure effective remediation. Mold can cause structural damage and health problems, making proper diagnosis critical. Below is a comprehensive guide to diagnosing your mold problem and tackling it successfully.

Mold often reveals itself in visible or sensory ways.

  • Visible discoloration: Look for black, green, white, or yellow spots on walls, ceilings, or floors.
  • Musty odor: A persistent damp smell may indicate hidden mold.
  • Health symptoms: Allergies, respiratory issues, or irritation that worsen indoors can signal mold presence.
  • Peeling or bubbling paint/wallpaper: Moisture buildup behind surfaces often leads to mold growth.

Since mold thrives in damp environments, identifying moisture sources is crucial.

Area Common Issues Actions to Investigate
Bathrooms Leaky faucets, poor ventilation Inspect tiles and plumbing
Kitchens Sink leaks, improperly sealed appliances Check under sinks and dishwashers
Basements Flooding or condensation Look for water stains
Roofs/Attics Roof leaks Examine ceilings for discoloration

Moisture control is key to preventing future mold growth.

  • Shine a flashlight in dark corners, crawlspaces, and basements.
  • Examine behind furniture and appliances where moisture might be trapped.
  • Use a screwdriver to probe wood materials for softness caused by rot.

If you suspect more extensive invisible growth (e. g. , inside walls), advanced techniques may be necessary.

Mold testing isn’t always required but can help confirm its existence if you’re unsure.

  1. Home testing kits– Affordable but less precise.
  2. Professional testing services– Provide accurate identification of species and severity.

Ensure samples are collected carefully if conducting DIY tests.

  • Small isolated patches (<10 sq ft): Typically manageable with DIY cleaning.
  • Moderate growth (10–30 sq ft): May require more intensive equipment like HEPA vacuums.
  • Large infestations (>30 sq ft): Professional remediation is strongly recommended.

Use this assessment as a guide on whether you need expert assistance.

Next Steps After Diagnosis

  1. Eliminate the moisture source immediately.
  2. Remove affected materials (e. g. , drywall) if necessary.
  3. Decide whether professional remediation services are required based on your findings.

By following these steps systematically, you’ll be better equipped to handle mold issues effectively while safeguarding your property and health from further harm.

Diagnosing Your Mold Problem – A Step-by-Step Guide to Effective Mold Removal

Accurately diagnosing a mold problem is the foundation of effective mold remediation. By following a step-by-step approach, you can identify the extent of contamination, pinpoint the source of moisture, and determine whether professional intervention is required. This guide will walk you through the process to ensure a thorough and safe response to mold issues in your home or workplace.

Mold can often go unnoticed until it has spread significantly.

  • Musty Odor:A persistent earthy or musty smell is often a sign of hidden mold.
  • Health Symptoms:Allergic reactions such as sneezing, coughing, or irritated eyes may indicate exposure to mold spores.
  • Water Damage:Peeling paint, water stains, or damp areas could signal conditions favorable for mold growth.

Regular inspections of high-risk areas (e. g. , basements, bathrooms) are critical for early detection.

Step 1: Identify the Type of Mold

Type Characteristics Potential Risks
Allergenic Causes allergic reactions Irritation in individuals sensitive to allergens
Pathogenic Can affect those with weak immune systems Respiratory infections and other health issues
Toxigenic Produces toxic substances Severe health threats due to mycotoxins

If you’re uncertain about the type of mold present in your space, consider consulting an expert for testing and identification.

Step 2: Locate the Source of Moisture

Mold thrives in damp environments.

  1. Inspect areas prone to leaks such as roofs, windowsills, plumbing systems, and HVAC units.
  2. Check for condensation on pipes or windows.
  3. Use a moisture meter on suspicious surfaces like drywall or wood.
  4. Monitor humidity levels indoors; keep them between 30%-50% using dehumidifiers if necessary.

Eliminating moisture sources is non-negotiable when tackling mold problems.

Step 3: Assess the Extent of Contamination

Determine how widespread the issue is by inspecting adjacent rooms and hidden spaces like behind wallpaper or under carpets. Categorizing contamination into small (less than 10 square feet), medium (10–30 square feet), or large-scale (greater than 30 square feet) helps decide whether DIY methods are appropriate or professional services are needed.

Step 4: Create an Action Plan for Remediation

  • Removing affected materials.
  • Cleaning nonporous surfaces with EPA-approved products.
  • Addressing ventilation issues.

For extensive contamination requiring containment measures like negative air pressure zones or protective gear beyond basic masks and gloves, hiring licensed professionals is highly recommended.

Effective diagnosis plays a critical role in not just removing current infestations but also preventing future occurrences by addressing root causes such as leaks and poor ventilation systems comprehensively.


Mold in the corner on the windowsill of a plastic window close-up stock photo

Mold remediation companies provide specialized services to identify, remove, and prevent the recurrence of mold in residential and commercial properties. These professionals are equipped with the expertise, tools, and techniques necessary for handling mold infestations safely and effectively, minimizing health risks and property damage. Below is a detailed look at what these companies do during the mold remediation process.

1. Thorough Mold Inspection and Assessment

The first step in mold remediation is identifying the extent of the problem. Companies typically: – Inspect visible areas of mold growth. – Use advanced tools like moisture meters, infrared cameras, or borescopes to detect hidden mold behind walls or under flooring. – Test air quality for elevated levels of mold spores. – Identify sources of moisture that are contributing to the growth.

A comprehensive inspection allows professionals to pinpoint affected areas and assess the severity of contamination.

2. Development of a Customized Remediation Plan

Once the inspection is complete, a remediation company creates a tailored action plan based on: – The extent and type of mold present (e.g., black mold vs. common household molds). – The size of the affected area (categorized as small-scale growth or large-scale contamination). – The condition of materials affected by mold (e.g., drywall, carpeting).

This plan outlines timelines, equipment needs, safety protocols, and steps required to restore the property.

3. Containment of Affected Areas

To prevent cross-contamination during removal: – Containment barriers like plastic sheeting or negative air chambers are set up. – Doors and vents leading out from contaminated zones are sealed off. – Negative air pressure systems may be used to ensure airborne spores cannot spread outside containment zones.

Effective containment is critical for protecting unaffected areas within your home or business.

4. Air Filtration Systems

Mold spores can easily become airborne during removal efforts. High-efficiency particulate air (HEPA) filtration systems are utilized to: – Capture microscopic spores floating in indoor air. – Improve indoor air quality throughout the process.

Some companies also use activated carbon filters to eliminate odors caused by prolonged mold presence.

Equipment Used Purpose
HEPA Vacuums Capture fine particles/surface cleaning
Air Scrubbers Remove airborne contaminants
Dehumidifiers Prevent future moisture buildup

5. Physical Removal of Mold

Depending on the extent of contamination: – Non-porous surfaces (like glass or metal) are cleaned using antimicrobial cleaners. – Porous materials such as drywall or carpets that cannot be salvaged may need removal and disposal under strict guidelines.

A combination of manual scrubbing techniques and specialized equipment ensures thorough elimination.

6. Sanitization

After removing visible mold colonies, surfaces must be sanitized: – Antimicrobial treatments are applied to inhibit regrowth. – Odor-neutralizing procedures may also be implemented.

Items such as furniture or personal belongings can be cleaned professionally if they’ve been exposed but remain salvageable.

7. Repairing Sources that Contribute to Mold Growth

Finally, addressing moisture issues is vital for preventing recurrence: – Plumbing leaks may require repairs by licensed contractors. – Roof leaks will need patching or replacement if severe damage exists.

Moisture control strategies often involve installing proper ventilation systems in high-humidity areas like basements or bathrooms.

By following these systematic steps, professional remediation companies not only eradicate existing infestations but also safeguard against future problems through proactive measures. Hiring trained professionals ensures the safety of your home environment while preserving its structural integrity over time.

Professional Black Mold Removal Hialeah, FL: Protect Your Home with Expert Techniques

When dealing with mold infestations, one of the most critical aspects of remediation lies in containing the affected area and ensuring that airborne mold spores do not spread to other parts of the home. Effective containment and air filtration are essential steps in safeguarding your living environment, minimizing health risks, and preventing cross-contamination. Below is a detailed look at these techniques and their significance.

The Purpose of Mold Containment

  • Isolate mold spores during remediation.
  • Prevent further contamination in unaffected areas.
  • Safeguard occupants from exposure to harmful airborne particles.

Without proper containment, mold spores can easily spread through HVAC systems or air currents, complicating the remediation process and increasing costs.

Key Methods for Mold Containment

  1. Plastic sheeting (6-mil polyethylene) is commonly used to seal off doorways, vents, and other openings.
  2. Entry points are often equipped with zippered access panels to maintain an effective barrier while allowing worker entry.
  3. Negative air machines are deployed within the sealed area to ensure that airflow moves inward rather than outward.
  4. These machines use exhaust fans to pull contaminated air out of the space while filtering it before releasing it outdoors.
  5. Vents connected to heating, ventilation, or air conditioning systems should be sealed during remediation.
  6. This prevents mold spores from being redistributed throughout your home.
  7. Misting water lightly over surfaces can help reduce airborne particles when disturbing mold colonies during cleaning or removal.

Importance of Air Filtration During Mold Remediation

Air filtration works hand-in-hand with containment efforts by capturing mold spores released into the air during cleaning or demolition activities. High-efficiency filtration improves indoor air quality and reduces respiratory hazards for both workers and residents.

Types of Air Filtration Equipment Used

  • HEPA Filters (High-Efficiency Particulate Air Filters): HEPA filters are capable of capturing 99.97% of particles as small as 0.3 microns, including mold spores.
  • Air Scrubbers: These portable machines draw in contaminated air, pass it through multiple filters (including HEPA), and release clean air back into the environment.
Equipment Function Benefits
Negative Air Machine Maintains containment via negative pressure Prevents spore spread across living spaces
HEPA Filter Removes small particles from airflow Improves overall indoor air quality
Air Scrubber Filters large volumes of indoor air Reduces airborne contaminants effectively

Additional Precautions During Containment

To further fortify safety measures: – Workers should wear personal protective equipment (PPE) such as respirators, gloves, goggles, and coveralls. – Double-bagging debris in heavy-duty garbage bags minimizes contamination risks during disposal. – Regular monitoring ensures that barriers remain secure throughout the project duration.

Proper containment paired with advanced filtration techniques is vital for successful mold remediation efforts. By implementing these methods correctly, you protect not only your property but also your health against potential hazards posed by airborne contaminants.

Winter issue: wall freezing, condensation, and black mold on plastic window slope stock photo

Expert Mold Removal Services Hialeah, FL: Protect Your Home with Effective Techniques

Proper mold containment and air filtration are critical components of any successful mold remediation process. These techniques help prevent the spread of mold spores to unaffected areas of your home while ensuring a cleaner, safer environment during and after the removal process. Below is a detailed look at effective methods for containment and filtration used by professionals.

The Importance of Mold Containment

Mold spores are microscopic and can easily become airborne, spreading throughout your home if not handled carefully. Containment is essential to:
Limit Cross-Contamination: Prevent spores from moving to uncontaminated areas.
Protect Occupants: Ensure the health and safety of those in the home during remediation.
Aid in Effective Removal: Create controlled zones for thorough cleaning and removal.

Common Mold Containment Methods

Professionally-trained technicians often implement the following containment strategies:
1. Establishing Physical Barriers:
– Use heavy-duty plastic sheets (6-mil polyethylene) to seal off affected areas. – Secure barriers with tape or adhesive to ensure they remain intact during work.

  1. Install air scrubbers with HEPA filters to create negative pressure within the contained area.
  2. Negative pressure ensures that air flows into, rather than out of, the contaminated space.
  3. Temporarily shut down or seal ductwork in affected areas.
  4. Prevents mold spores from traveling through vents into other parts of the home.
  5. Technicians wear disposable suits, gloves, and shoe covers to avoid transferring spores externally.

Air Filtration Techniques in Mold Remediation

HEPA Filters (High-Efficiency Particulate Air Filters):
  • HEPA filters capture 99.97% of particles as small as 0.3 microns, including mold spores.
  • Professionals use HEPA-filtered vacuum systems for both surface cleaning and air purification.
Air Scrubbers:

These portable devices draw in polluted air, filter it through multiple layers (including HEPA filters), and release clean air back into the room. Key benefits include:
– Reducing airborne spore levels during removal activities. – Improving overall indoor air quality post-remediation.

Steps for Proper Implementation

Step Number Action Purpose
1 Isolate affected area Reduce risk of contamination spread
2 Set up negative pressure zone Ensure inward airflow prevents spore escape
3 Install air scrubbers Capture airborne particles effectively
4 Employ HEPA vacuums Remove settled spores on surfaces

Final Tips for Homeowners

For added peace of mind, homeowners should always hire trained professionals who follow industry-standard guidelines such as those set by the IICRC (Institute of Inspection Cleaning and Restoration Certification). DIY attempts may exacerbate contamination risks if proper containment protocols are not followed.

By prioritizing advanced containment measures and using effective filtration systems, you can protect both your property’s structure and your family’s health during any mold remediation project.

A Step-by-Step Overview of the Mold Removal and Cleaning Process

Mold removal is a critical process that involves careful planning, specialized tools, and expertise to ensure safe and thorough remediation. Below is a detailed step-by-step overview of the typical mold removal and cleaning process followed by professionals.

Step 1: Initial Assessment and Inspection

The first step in mold removal is conducting a detailed assessment of the affected area. This includes:
– Identifying visible mold growth.
– Detecting hidden mold using specialized equipment such as moisture meters or infrared cameras. – Determining the extent of contamination based on established guidelines (e.g., the IICRC S520 Standard for Professional Mold Remediation).
The goal during this stage is to understand how widespread the issue is and locate the source of excess moisture, which likely caused the mold growth.

Step 2: Establishing Containment Zones

To prevent mold spores from spreading to unaffected areas during cleanup, professional mold remediators establish containment measures. Key techniques include:
– Using plastic sheeting to seal off contaminated areas. – Installing negative air machines with HEPA filtration to create a pressure gradient that confines airborne spores. – Limiting access to containment zones to authorized personnel only.

Step 3: Air Filtration Setup

Air filtration is crucial throughout the remediation process to capture airborne mold spores and improve indoor air quality. Professionals typically use:
– HEPA air scrubbers capable of trapping particles as small as 0.3 microns.
– High-efficiency vacuums equipped with HEPA filters for surface cleaning.

This step ensures that any disturbed spores are removed effectively while minimizing cross-contamination.

Step 4: Mold Removal and Cleaning Techniques

  1. Surface Cleaning: Nonporous materials like glass or metal can be cleaned using antimicrobial solutions or detergents specifically designed for mold removal.
  2. Sanding or Wire Brushing: For semi-porous materials like wood, sanding may be employed to remove deeply embedded spores.
  3. Removal of Damaged Materials: Porous items like drywall, insulation, or carpeting often require complete removal because they trap moisture easily, making thorough decontamination difficult.
  4. Dry Ice Blasting: In some cases, professionals use dry ice blasting for hard-to-reach areas such as crawl spaces or attics; this technique effectively removes mold without causing damage.

Professionals will also properly bag and dispose of any contaminated materials following local regulations.

Step 5: Applying Antimicrobial Treatments

Once all visible mold has been removed, technicians apply antimicrobial treatments to disinfect surfaces further and prevent regrowth. These treatments may include industrial-grade fungicides designed for long-term protection.

For added safety in high-risk environments (e.g., post-flooding situations), encapsulating agents may also be applied—these seal surfaces after cleaning to inhibit future fungal activity.

Step 6: Drying and Moisture Control

Ensuring that all affected areas are thoroughly dried is essential for preventing new growth cycles since moisture is a key contributor to mold development. This step involves: – Using dehumidifiers suited for large spaces or high-moisture environments. – Increasing ventilation where possible by utilizing fans or opening windows. – Monitoring humidity levels with hygrometers until they reach acceptable ranges (typically below 50%).

Professionals also address any water intrusion issues (e.g., repairing leaks) at this stage if it hasn’t been resolved already.

Step 7: Final Inspection

After completing cleaning efforts, professionals conduct follow-up inspections: – Verifying that visual signs of contamination have been eradicated. – Testing air quality using spore count analysis when necessary.

This ensures that cleanup efforts meet both safety standards and client expectations before declaring an area safe for reoccupation.

By following these systematic steps during the remediation process, professional companies help restore healthy indoor environments efficiently while addressing root causes that lead to long-term solutions against future outbreaks of molds on properties.

Mold on the wet window. stock photo

How a Mold Removal Company Hialeah, FL Can Help Prevent Future Mold Growth Through Moisture Control and Repairs

Mold thrives in damp, humid conditions, making moisture control a critical aspect of preventing its growth. Without addressing the underlying causes of moisture buildup, mold can reappear even after a thorough removal process. This section highlights the importance of controlling moisture levels and repairing sources of water intrusion to ensure a mold-free environment.

Why Moisture Control is Crucial

Mold requires three primary elements to grow: organic material, warmth, and moisture. While organic materials are often unavoidable in homes (e.g., wood, drywall), controlling the moisture component is key to halting mold development. Persistent moisture creates an ideal breeding ground for spores to proliferate and spread across surfaces.

The following problems are often associated with excess moisture:
– Warping or weakening of wood structures
– Damage to walls, ceilings, and flooring
– Poor indoor air quality due to increased humidity
– Increased risk of respiratory issues for occupants

Common Sources of Moisture Problems

  1. Leaking Pipes or Plumbing Fixtures: Hidden leaks behind walls or under sinks can lead to unnoticed water damage over time.
  2. Roof Leaks: Damaged shingles or flashing may allow rainwater to seep into attics or ceilings.
  3. Condensation Build-Up: Poor ventilation can cause condensation on windows, HVAC systems, or cold surfaces within the home.
  4. Flooding Incidents: Significant water damage from floods can leave behind residual moisture in walls and flooring if not properly dried.
  5. Basement Dampness: Poor drainage around foundations or cracks in basement walls can allow groundwater seepage.

Steps for Effective Moisture Control

1. Repair Water Intrusion Issues

  • Fix leaking pipes promptly by calling a plumber.
  • Patch any cracks in walls, foundations, or ceilings.
  • Replace damaged roofing materials to prevent rain infiltration.

2. Improve Ventilation

  • Use exhaust fans in kitchens and bathrooms during cooking or showering.
  • Install dehumidifiers in damp areas such as basements.
  • Ensure HVAC systems are properly maintained with clean air filters.

3. Maintain Optimal Indoor Humidity

  • Keep indoor humidity levels between 30%–50% using hygrometers for monitoring.
  • Avoid activities that increase humidity unnecessarily (e.g., drying clothes indoors).

4. Redirect Exterior Water Sources

  • Install gutters and downspouts to channel rainwater away from the building foundation.
  • Use landscaping techniques like grading soil away from your home’s base.
Problem Area Suggested Solution
Leaking Pipes Inspect regularly; repair leaks immediately
Roof Leaks Replace damaged shingles; check attic insulation
Condensation Increase airflow; use a dehumidifier
Flooded Areas Dry completely; remove water-damaged materials
Basement Dampness Seal cracks; use sump pumps if necessary

Benefits of Addressing Moisture Issues

Taking steps to mitigate excess moisture has several long-term benefits:
– Reduced likelihood of recurring mold infestations
– Improved structural integrity by preventing rot and decay
– Lower energy bills due to efficient HVAC operation without excess humidity
– Healthier living spaces free from allergens associated with mold growth

By addressing both current sources of water damage and taking preventative measures against future incidents, homeowners can significantly reduce the risk of mold returning after remediation efforts have been completed effectively.

A person with a spatula removes stains of toxic mold and fungal bacteria on the wall in the corner near the door. Concept of condensation, moisture. Problems with ventilation. High humidity. stock photo

Mold remediation is a critical step in restoring the safety and health of your living environment. However, the work does not end once the mold removal process is complete. After remediation, it’s essential to take specific measures to ensure your home remains mold-free and safe for occupancy. This guide provides actionable steps to help you maintain a healthy home post-remediation.

Inspect and Maintain HVAC Systems

  • Replace air filters with high-efficiency particulate air (HEPA) filters. These are designed to trap fine particles, including potential mold spores.
  • Schedule a professional inspection of your ductwork to check for residual mold or moisture buildup within the system.
  • Clean vents and ducts regularly to prevent dust accumulation, which can serve as food for mold growth.

Monitor Humidity Levels

  • Use a hygrometer to monitor indoor humidity levels; aim for levels between 30% and 50%.
  • Install dehumidifiers in areas prone to high moisture, such as basements or bathrooms.
  • Address condensation on windows or walls promptly by improving insulation or ventilation.
Location Recommended Action Tools Needed
Basement Use a dehumidifier Dehumidifier, Hygrometer
Bathroom Install an exhaust fan Exhaust fan, Caulking
Windows Reduce condensation Insulation materials

Perform Routine Checks for Moisture

  1. Inspect areas prone to water leaks, such as under sinks, around bathtubs, and near washing machines.
  2. Check ceiling corners and walls after heavy rainstorms for signs of water stains or dampness.
  3. Regularly clean gutters and downspouts to prevent water pooling around your home’s foundation.

Establish Robust Cleaning Practices

  • Vacuum carpets using a vacuum with HEPA filtration technology.
  • Wash curtains and fabrics regularly, especially in humid rooms.
  • Wipe down hard surfaces like counters and shelves with antimicrobial cleaning solutions.
Item/Area Frequency
Carpets Weekly
Kitchen Surfaces Daily
Bathroom Tiles Biweekly

Assess Indoor Air Quality Regularly

  • Invest in an air purifier with HEPA filters designed specifically for allergens and spores.
  • Replace furnace filters every three months or sooner if you live in high-pollen regions.
  • Test indoor air periodically using professional services if you notice signs of poor quality (e.g., musty odors).

A proactive approach will help ensure that all efforts taken during remediation are preserved long-term while fostering a safer living environment for everyone at home.

How to Choose the Best Mold Removal Company and Prevent Future Issues

Once mold remediation is complete, ensuring your home remains mold-free requires proactive measures. These steps are essential to safeguard your living space and avoid recurring mold problems. Below are actionable strategies to prevent future issues after mold removal.

Effective Mold Remediation: Monitor Humidity Levels

Mold thrives in environments with high humidity, so controlling moisture is key to preventing its return.
Ideal Indoor Humidity: Maintain indoor humidity levels between 30% and 50%.
Tools for Monitoring: Use a hygrometer to measure humidity levels in different areas of your home.
Dehumidifiers: Invest in a dehumidifier for spaces prone to moisture, such as basements or bathrooms.

Tips for Effective Black Mold Removal and Addressing Ventilation Issues

Proper air circulation reduces moisture buildup, which can contribute to mold growth. Consider the following:
Ventilation Systems: Ensure HVAC systems are properly maintained and functioning efficiently.
Exhaust Fans: Install or repair exhaust fans in kitchens, bathrooms, and laundry rooms to reduce steam buildup during activities like cooking or showering.
Open Windows: When weather permits, open windows periodically to improve airflow throughout your home.

Regularly Inspect for Leaks to Avoid Needing Mold Removal Services in Hialeah FL

Water leaks are one of the primary causes of recurring mold issues. Be diligent about inspecting your home for potential water intrusion:
| Area of Concern | Potential Problem | Recommended Action |
|———————|——————————————-|————————————————|
| Roof | Missing shingles or damaged flashing | Repair leaks promptly; check after storms |
| Plumbing | Leaking pipes under sinks or behind walls | Fix leaks immediately; monitor problem areas |
| Windows/Doors | Improper sealing | Reseal gaps using caulk or weather-stripping |

Clean Surfaces Properly

Thorough cleaning practices help keep surfaces free from spores that could develop into mold under the right conditions:
– Use a HEPA vacuum cleaner on carpets and upholstery to remove residual spores post-remediation. – Clean hard surfaces (e.g., countertops and tiles) with soap and water or specialized cleaners designed for anti-microbial use. – Wash fabrics like curtains or bedding regularly if they’re exposed to damp conditions.

Keep an Eye on Vulnerable Areas

Certain locations within your home may be more prone to moisture accumulation due to their nature or usage patterns:
High-Risk Locations
– Basements
– Attics
– Bathrooms
Tips for Maintenance
Inspect these areas monthly for signs of dampness, musty odors, or visible mold spots.

Educate Household Members

Do’s:

  • Hang wet towels outside rather than leaving them inside damp spaces like bathrooms.
  • Dry spills immediately before liquid seeps into porous materials.

Don’ts:

  • Avoid blocking air vents with furniture as it reduces ventilation.
  • Avoid overwatering plants where excess water could promote indoor humidity spikes.

By implementing these strategies consistently after professional remediation services, you reduce the likelihood of dealing with repeat infestations while maintaining a healthy indoor environment suitable for everyone living there.

When to Get a Post-Mold Remediation Inspection and Why It Matters

After mold remediation, it is critical to confirm that the process has been successful and that your home is safe for occupancy. A post-remediation inspection provides this assurance by verifying that mold levels are within an acceptable range and that all sources of contamination have been addressed. Here’s an in-depth look at when you should schedule one and why it’s so important.

What is a Post-Mold Remediation Inspection?

  • The affected area has been thoroughly cleaned.
  • Mold contamination has been reduced to safe levels.
  • The underlying issue causing the mold growth has been resolved.

This process often includes visual assessments, air quality testing, moisture measurements, and surface sampling performed by certified professionals.

When Should You Schedule the Inspection?

  1. Once remediation experts complete their work, schedule an inspection before rebuilding or repainting begins. This ensures no hidden mold remains.
  2. An inspection prior to moving back into treated spaces guarantees your safety from potential health risks caused by residual spores.
  3. If you notice suspicious signs of mold—such as odors or discoloration—after treatment, request an inspection to address any lingering problems promptly.

Why Post-Mold Remediation Inspections Are Critical

  • Verification of Success: It confirms whether the remediation was effective in eliminating existing mold issues.
  • Air Quality Assurance: Testing ensures spore levels meet acceptable indoor air quality standards.
  • Prevention of Re-contamination: Identifying unresolved moisture issues or leaks can prevent future outbreaks.
  • Health Protection: Ensures residents are not exposed to allergens or harmful toxins related to mold.
Importance Benefits
Health Reduces risks of respiratory issues, allergies, and other health concerns
Safety Ensures no structural damage remains from hidden moisture
Financial Prevents costly repairs caused by recurring mold

What Should Be Included in a Post-Remediation Inspection?

  • Visual Assessment: A thorough check of treated surfaces for visible signs of mold or water damage.
  • Moisture Testing: Identification of damp areas using specialized tools like hygrometers or infrared cameras.
  • Air Sampling: Measurement of airborne spore counts compared to outdoor levels.
  • Surface Sampling (if needed): Laboratory analysis of cleaned surfaces to detect residual contamination.

Hiring a Qualified Mold Inspector

  • Verify certifications such as IICRC (Institute of Inspection Cleaning and Restoration Certification) or NORMI (National Organization of Remediators and Mold Inspectors).
  • Ask about their equipment and testing methods.
  • Request references or reviews from previous clients.

Investing in a comprehensive post-mold remediation inspection provides peace of mind that your home is safe and protected against future issues. Properly addressing every aspect ensures long-term comfort and well-being for occupants while safeguarding your property’s integrity from recurring damage.

Black fungus on the wall near the plastic window. Mold and fungus destroy the white wall in the house. The wall needs to remove the fungus stock photo

Effective Cleaning Practices for Your Home After Mold Remediation

Proper cleaning after mold remediation is a critical step in ensuring your home remains safe and mold-free. Even after professional remediation, some areas may still harbor spores or other contaminants. Implementing effective cleaning practices can help maintain a clean environment and prevent future mold issues.

Why Post-Mold Remediation Cleaning is Important

  • Eliminates Residual Spores: Microscopic mold spores may remain even after professional removal and can lead to regrowth if left unchecked.
  • Reduces Contaminants: Dust, debris, or chemicals from the remediation process can linger on surfaces. Proper cleaning ensures your space is safe for everyday living.
  • Enhances Air Quality: Thorough cleaning helps improve indoor air quality by removing allergens that could trigger respiratory issues.

Essential Cleaning Steps to Take After Mold Remediation

  1. Use a damp microfiber cloth to wipe down walls, ceilings, floors, and furniture.
  2. Focus on high-touch areas such as door handles, light switches, and countertops.
  3. Avoid dry dusting as it can cause mold spores to become airborne.
  4. Utilize a vacuum cleaner with a HEPA filter to trap fine particles and spores.
  5. Pay close attention to carpets and rugs, as these materials often retain moisture.
  6. Launder curtains, cushion covers, bedding, and any other washable fabrics in hot water.
  7. For non-washable items like upholstered furniture, consult a professional cleaner for safe treatment methods.
  8. Apply an EPA-approved disinfectant designed for mold prevention.
  9. Follow the manufacturer’s instructions carefully for effective use.
  10. Change air filters in your heating and cooling systems immediately after remediation.
  11. Consider upgrading to filters with higher MERV ratings (Minimum Efficiency Reporting Value) for enhanced filtration of small particles.

Recommended Cleaning Supplies

Product Type Purpose Example Products
Microfiber Cloths Trap dust/mold spores Reusable microfiber wipes
HEPA Vacuum Cleaner Remove fine particles Dyson or Shark vacuums
EPA-Approved Cleaner Disinfect surfaces Concrobium Mold Control
Laundry Detergent Wash soft fabrics Hypoallergenic liquid soap

Tips for Maintaining Cleanliness Long-Term

  • Establish a regular cleaning schedule that focuses on areas prone to dampness (e.g., bathrooms and basements).
  • Run dehumidifiers in poorly ventilated spaces to prevent moisture buildup that could encourage mold growth.
  • Use air purifiers with HEPA filters to continually capture airborne particles such as dust or spores.

A clean home not only ensures better health but also extends the lifespan of your property by minimizing damage caused by residual contaminants after remediation efforts are complete. Adopting these effective practices will give you peace of mind while reducing the risk of recurring microbial growth in your living space.

Understanding Mold Prevention Strategies to Protect Your Living Space

After dealing with mold remediation, it’s essential to implement strategies that ensure your home remains mold-free. Without proactive measures, there is a risk of recurring issues, which can lead to health complications and damage to your property. Below are effective strategies for preventing mold and protecting your living environment.

Why Mold Prevention Matters

Mold thrives in environments with moisture, warmth, and organic material. If left unchecked, it can cause structural damage to your home and pose health risks such as respiratory issues, allergies, and infections. By focusing on prevention, you can reduce these risks significantly.

Key Mold Prevention Strategies

  1. Maintain indoor humidity levels between 30%–50%. Use a hygrometer to monitor humidity in different areas of your home.
  2. Employ dehumidifiers, especially in damp spaces such as basements or laundry rooms.
  3. Use air conditioning during hot and humid months to reduce moisture levels indoors.
  4. Ensure proper ventilation in high-moisture areas like bathrooms, kitchens, and laundry rooms.
  5. Install exhaust fans or open windows when cooking or showering.
  6. Avoid blocking air vents with furniture or curtains.
  7. Regularly inspect plumbing systems for leaks under sinks or behind appliances.
  8. Check your roof for cracks or missing shingles that could allow water infiltration.
  9. Seal foundation cracks where water might enter during heavy rain.
  10. Opt for mold-resistant drywall or insulation when renovating damp-prone areas.
  11. Apply anti-microbial paint in bathrooms or basements to inhibit future growth.
  12. Dust and vacuum surfaces frequently using a HEPA filter vacuum cleaner.
  13. Wipe down walls and window sills where condensation may accumulate.
  14. Wash fabrics like curtains, rugs, and upholstery that attract dust and moisture.
  15. Reduce condensation on windows by using double-paned glass or insulating film.
  16. Keep interior glass surfaces dry by wiping them regularly during cooler months.

Best Practices: Table of Maintenance Frequency

Maintenance Task Recommended Frequency
Inspect plumbing for leaks Every 3 months
Clean gutters Twice a year (Spring/Fall)
Check HVAC filters Monthly
Monitor indoor humidity Weekly
Deep clean carpets/fabrics Every 6 months

Red Flags Indicating Potential Mold Issues

Even with preventive measures in place, it’s vital to stay vigilant about early signs of mold growth: – Persistent musty odors – Discoloration on walls or ceilings – Recurring allergies despite cleaning efforts – Unexplained water stains on surfaces

By incorporating these strategies into regular home maintenance routines and addressing issues promptly when they arise, you can create an environment that deters mold growth while maintaining the safety and health of your living space.

How Controlling Humidity Levels Can Help Prevent Mold Growth

Maintaining proper humidity levels in your home is a crucial step in preventing mold growth. Mold thrives in damp environments, making it essential to monitor and control the moisture levels indoors. Below, we’ll explore why controlling humidity matters, recommended practices, and tools to keep your home mold-free.

Why Humidity Control is Essential

Mold spores are naturally present in the air, but they require moisture to grow and multiply. When indoor humidity surpasses 60%, conditions become ideal for mold development. High humidity can also lead to condensation on walls, windows, and other surfaces, creating a breeding ground for mold.

Key problems caused by uncontrolled humidity include:
Structural damage: Prolonged exposure to moisture can weaken walls, ceilings, and floors.
Health risks: Mold exposure may worsen allergies or respiratory issues for occupants.
Unpleasant odors: Persistent dampness often leads to musty smells that are hard to eliminate.

Recommended Indoor Humidity Levels

To minimize the risk of mold growth, aim for an indoor relative humidity (RH) level between 30% and 50%. This range strikes a balance between comfort for household members and discouraging mold proliferation.

Season Recommended Humidity Level
Winter 30% – 40%
Spring/Summer 40% – 50%
Fall 40% – 50%

Tools for Controlling Humidity

  • Dehumidifiers: These devices remove excess moisture from the air, making them essential in basements or other damp areas.
  • Hygrometers: Use these inexpensive gadgets to monitor indoor RH levels regularly.
  • HVAC Systems with Humidistats: Many modern HVAC systems come equipped with built-in humidistats that allow precise control over indoor air quality.
  • Exhaust Fans: Install fans in bathrooms, kitchens, and laundry rooms to expel humid air during activities like showering or cooking.

Practical Tips to Reduce Indoor Humidity

  1. Ventilation Matters
    Open doors and windows periodically or use mechanical ventilation systems when weather permits. Proper airflow reduces stagnant air where moisture can build up.
  2. Fix Water Leaks Promptly
    Inspect plumbing fixtures regularly and address leaks as soon as you notice them. Even minor drips can contribute significantly to elevated moisture levels over time.
  3. Dry Wet Areas Immediately
    Clean up spills on floors or carpets without delay, as standing water can feed mold growth within hours.
  4. Regulate Indoor Temperature
    Keep temperatures consistent throughout the year by using thermostats. Drastic fluctuations may encourage condensation formation on cooler surfaces like windowsills or walls.
  5. Improve Drainage Around Your Home
    Ensure that gutters direct rainwater away from the foundation of your house to prevent excess water infiltration indoors.

By maintaining optimal humidity levels through proactive measures like monitoring RH percentages and investing in moisture-control solutions, you significantly reduce the chances of mold taking root indoors while fostering a healthier living environment overall.

black mold on the window. stock photo

How Detecting and Preventing Leaks Can Stop Mold Before It Starts

Detecting and preventing leaks is one of the most critical steps in stopping mold growth before it becomes a problem in your home. Mold thrives in damp environments, and even a minor leak can create the perfect conditions for mold spores to colonize and spread. Here’s what you need to know about identifying potential leaks and preventing them.

Why Leaks Are a Key Contributor to Mold Growth

Leaks introduce moisture into spaces that should remain dry, such as walls, ceilings, floors, or hidden areas like crawl spaces and behind appliances. This moisture not only facilitates mold growth but also damages structural materials over time.

Common causes of leaks include:
Plumbing issues: Faulty pipes, loose fittings, or worn-out seals.
Roof damage: Missing shingles or improperly sealed flashing.
HVAC problems: Condensation buildup due to poor drainage.
Appliance malfunctions: Leaking dishwashers, washing machines, or water heaters.

By proactively identifying these vulnerabilities, you can reduce the risk of water accumulation that invites mold.

How to Detect Leaks Early

  1. Look for visible signs such as water stains on walls or ceilings.
  2. Check for discoloration around windows and doors where water intrusion might occur.
  3. Examine exterior walls for cracks or gaps where water might seep in during rainstorms.
  4. Keep an eye on your water bill for sudden spikes in usage that could indicate hidden leaks.
  5. Test individual plumbing fixtures by turning off all faucets to see if your water meter continues running.
  6. Invest in moisture meters or leak sensors that alert you when humidity levels rise unexpectedly.
  7. Infrared cameras can help detect temperature changes caused by hidden moisture pockets inside walls.
  8. Musty odors are often an early sign of excess moisture from undetected leaks.

Preventive Measures for Avoiding Leaks

  • Maintain Plumbing Systems:
    Inspect pipes regularly for corrosion or wear-and-tear, especially under sinks and behind toilets. Replace aging components promptly.
  • Seal Windows and Doors:
    Use weatherproof caulk or sealant around window frames and door edges to prevent rainwater intrusion during storms.
  • Inspect the Roof Annually:
    Check roof shingles, gutters, downspouts, and flashing at least once a year—and after severe weather events—to ensure they are intact and functioning properly.
  • Service Appliances Regularly:
    Ensure appliances such as dishwashers have secure connections; clean filters frequently; replace worn-out hoses every few years.

Quick Reference Table

Task Frequency Tools Needed
Inspect plumbing Every 6 months Flashlight, wrench
Check roof Annually/After storms Ladder
Clean gutters Biannually Gloves, hose
Test water meter Quarterly Water flow calculator
Seal windows/doors Annually Caulk/sealant

Long-Term Benefits

By actively detecting and preventing leaks in your home environment:
– You minimize repair costs associated with extensive mold remediation later on. – You protect indoor air quality by eliminating conditions conducive to mold growth. – Your home’s structural integrity remains intact over time.

Being vigilant about maintenance today ensures a safer living space tomorrow while safeguarding against costly repairs caused by unchecked moisture intrusion.

How Detecting and Preventing Leaks Can Stop Mold Before It Starts

Mold thrives in environments where moisture is present, making leaks one of the most common culprits behind mold growth. Addressing leaks promptly and taking preventative measures can significantly reduce the risk of mold in your home. Here’s a comprehensive guide on how detecting and preventing leaks can help you maintain a mold-free living space.

Why Leaks Lead to Mold Growth

  • Roof damage: Missing shingles or clogged gutters can result in water seeping into your attic or walls.
  • Plumbing issues: Burst pipes, dripping faucets, or unsealed fittings create continuous moisture buildup.
  • Window or door seals: Improper sealing allows rain or condensation to enter your home.
  • Appliance malfunctions: Dishwashers, washing machines, and refrigerators with faulty connections may cause hidden water accumulation over time.

How to Detect Leaks Early

  1. Conduct routine inspections: Check under sinks, around appliances, in basements, and along rooflines for signs of water damage or puddles.
  2. Monitor your water bill: A sudden increase in usage could indicate a hidden plumbing leak.
  3. Stains on ceilings or walls
  4. Peeling paint or wallpaper
  5. Warping floors
  6. Install water sensors in vulnerable areas like basements and near appliances.
  7. Consider using infrared cameras to detect moisture behind walls.
  8. Check for standing water near your foundation or improperly graded landscaping that directs rainwater toward your home.

Preventing Leaks to Stop Mold Before It Starts

  • Maintain roofing systems: Regularly clean gutters and downspouts to ensure proper drainage during rainfall. Repair damaged shingles promptly.
  • Upgrade plumbing fixtures: Replace old pipes with durable materials like PEX or copper. Use thread sealant tape on all fittings during installation.
  • Seal all openings properly: Apply weatherproof caulk around windows and doors. Install door sweeps to prevent drafts that lead to condensation.
  • Improve exterior drainage systems: Ensure that downspouts direct water at least five feet away from the foundation. Add a French drain if you notice consistent pooling near your house after heavy rains.

Monitoring Long-Term Moisture Levels

Tool/Method Purpose
Hygrometers Measure indoor humidity levels (ideal range: 30%-50%).
Dehumidifiers Reduce excess moisture in damp-prone rooms like basements or bathrooms.
Visual Inspections Regularly check previously repaired areas for new signs of water damage.

By proactively detecting and preventing leaks while managing indoor humidity levels effectively, you’ll create an environment where mold struggles to develop—helping you maintain both the integrity of your home and the health of its occupants long term.

hand in glove sprays the product on wall from black mold. dangerous fungus stock photo

Mold growth in your home or business is not just an aesthetic issue; it represents a serious health risk and can cause structural damage to your property. While some may consider addressing mold with DIY methods, opting for professional mold removal ensures the thorough elimination of the issue and minimizes long-term risks.

Health Risks of Mold Exposure

  • Respiratory Issues: Chronic coughing, wheezing, and nasal congestion.
  • Allergic Reactions: Sneezing, skin rashes, and itchy eyes.
  • Asthma Complications: Increased frequency and severity of asthma attacks in those with preexisting conditions.
  • More Severe Concerns in Vulnerable Groups: Infants, elderly individuals, and those with weakened immune systems are at higher risk for severe infections or respiratory illnesses due to mold exposure.

Professionals use advanced tools and techniques that limit the spread of spores during removal, minimizing these risks while ensuring a healthier environment.

Structural Risks Associated With Mold

  1. Weakens Walls and Foundations: Mold consumes structural components like wooden beams or drywall over time.
  2. Decreases Property Value: A property infested with visible mold will likely deter potential buyers or tenants.
  3. Leads to Costly Repairs: The longer mold remains in your home untreated, the more extensive the damage becomes—resulting in costly remediation efforts.

Professional remediation services not only address current mold issues but also work proactively to prevent future outbreaks by identifying sources of moisture or leaks.

Benefits of Hiring Professional Mold Remediation Services

  1. Thorough Inspection & Testing
    Professionals conduct detailed inspections using specialized equipment like moisture meters or air quality monitors to identify hidden mold growth that might escape notice during DIY attempts.
  2. Customized Containment Plans
    Experts establish containment zones (e.g., negative air pressure systems) during remediation efforts to prevent cross-contamination throughout your property.
  3. Proper Disposal Methods
    Contaminated materials are removed safely following local regulations to avoid further spread of spores.
  4. Post-Removal Prevention Strategies
    After cleanup is complete, professionals provide recommendations such as improving ventilation or repairing leaks that encourage mold growth.
Professional Expertise DIY Efforts
Conducts thorough testing Relies on visual detection
Uses specialized tools Limited by household cleaning supplies
Follows safety standards Risk of improper handling
Identifies underlying causes Focuses on surface-level cleaning

Why Acting Quickly Matters

  1. Mold spreads rapidly—colonies can grow within 24–48 hours under ideal conditions.
  2. Neglecting early removal increases health risks as spore concentrations rise.
  3. Delaying professional remediation allows structural damage to worsen over time.

Choosing expert services ensures peace of mind knowing both your health and property are safeguarded against long-term complications caused by unchecked mold growth.

By prioritizing professional intervention over makeshift solutions, you invest in maintaining a safe living space while protecting one of your most valuable assets—your home or business property.

How a Mold Removal Company Can Help You Avoid Health Risks

Mold exposure is a serious issue that can have significant health and structural implications for your home. When mold begins to grow indoors, it releases tiny spores into the air that can be inhaled or come into contact with skin. These spores, while often invisible to the naked eye, can pose a variety of health risks—especially for those with pre-existing conditions or sensitivities. Acting quickly to address mold growth is essential in minimizing these risks and protecting both your health and property.

Essential Tips for Effective Black Mold Removal and Health Protection

  • Respiratory Issues: Coughing, wheezing, nasal congestion, and difficulty breathing.
  • Allergic Reactions: Sneezing, itchy eyes or throat, rashes, or skin irritation.
  • Asthma Complications: For individuals with asthma, mold exposure can trigger more frequent or severe attacks.
  • Chronic Illness: Prolonged exposure to certain molds may lead to persistent fatigue or more severe respiratory illnesses.

Certain groups are particularly vulnerable: – Infants and young children – The elderly – Individuals with weakened immune systems – People suffering from chronic respiratory diseases such as asthma or COPD

Effective Mold Removal Services in Hialeah FL: Why Speed Matters

  1. Increased Health Risks: The longer mold goes untreated, the more spores it releases into your home’s air.
  2. Structural Damage: Over time, mold breaks down building materials such as drywall and wood.
  3. Costly Repairs: A minor issue caught early is far less expensive than addressing widespread contamination later.

Common Scenarios That Lead to Mold Growth

Being aware of situations that foster mold growth is critical in preventing its spread: – Water leaks from plumbing fixtures or appliances – Flooding due to storms or basement seepage – High indoor humidity levels (above 60%) – Poor ventilation in areas like bathrooms and kitchens

Table: Comparison of Mold Severity Levels

Severity Level Indicators Recommended Action
Minor (Surface Mold) Small patches on walls/ceilings Clean affected surfaces promptly
Moderate (Visible Spread) Larger areas with discoloration Consider consulting a professional
Severe (Hidden/Extensive) Musty odor; damage behind walls/floors Professional removal necessary

Steps You Should Take Immediately

If you suspect mold growth in your home: 1. Identify the source of moisture causing the problem. 2. Dry affected areas thoroughly using dehumidifiers or fans. 3. Avoid direct contact with suspected mold; wear gloves and masks if necessary. 4. Call a certified professional for an inspection if the infestation is extensive.

By acting quickly and understanding the potential dangers associated with prolonged exposure, you can safeguard your health while preventing long-term damage to your property.

The Risks of DIY Mold Removal: Why Professional Help is Essential

While it may seem tempting to address a mold problem on your own, attempting DIY mold removal often carries significant risks. Mold remediation requires specialized knowledge, equipment, and techniques to ensure the problem is effectively resolved without endangering your health or further damaging your property. Below, we explore the key reasons why professional help is essential when dealing with mold infestations.

Insufficient Knowledge and Experience

Mold growth can vary widely in terms of type, severity, and location. Without the proper expertise: – You may misidentify the type of mold present, which could lead to using ineffective or unsafe removal methods. – Mold can grow in hidden areas like behind walls or under flooring. DIY efforts might fail to address these concealed colonies, leading to recurring issues.

Professionals are trained to identify different kinds of mold and assess their impact on both health and structural integrity.

Health Hazards

Exposure during a DIY cleanup can pose serious health risks, especially if proper precautions are not taken. Common issues include: – Respiratory problems due to inhaling spores. – Allergic reactions such as skin irritation, watery eyes, and runny nose. – Aggravation of asthma and other pre-existing conditions.

Professional teams use protective gear like respirators, gloves, goggles, and hazmat suits to mitigate these risks while ensuring safe cleanup practices.

Lack of Proper Equipment

DIYers often lack access to industrial-grade tools that professionals bring to the job. These include: – HEPA vacuums: To safely remove spores from surfaces without releasing them into the air. – Air scrubbers: To filter airborne contaminants during remediation. – Moisture meters: To detect hidden moisture that promotes mold growth.

Without this equipment, even thorough cleaning efforts might leave spores behind or fail to address underlying causes like humidity or leaks.

Key Equipment Purpose
HEPA Vacuums Removes mold from surfaces
Air Scrubbers Filters airborne particles
Moisture Meters Detects hidden moisture sources

Risk of Spreading Mold Further

During improper removal attempts: 1. Disturbing mold colonies can release thousands of tiny spores into the air. 2. These spores can settle in new areas of your home and lead to additional contamination.

Professionals contain affected areas using specialized measures such as plastic sheeting barriers and negative air pressure systems before beginning remediation work.

Underlying Causes May Be Overlooked

Mold doesn’t just appear out of nowhere; it thrives in environments with excess moisture caused by factors such as leaks or poor ventilation. A DIY approach may focus solely on visible growth without addressing these root causes: – Leaky pipes or roofs. – Inadequate insulation leading to condensation buildup. – Faulty HVAC systems harboring hidden mold colonies.

Professionals conduct thorough inspections to identify these issues and provide recommendations for long-term prevention strategies.

Legal Considerations for Property Owners

If you’re a landlord or property owner dealing with tenant complaints regarding mold: 1. Inadequate remediation could expose you to lawsuits over negligence or unsafe living conditions. 2. Hiring certified professionals ensures accountability while providing documentation that the issue was resolved properly.

Opting for professional help not only ensures effective treatment but also safeguards your health, protects property value, and minimizes liability concerns associated with improper handling of hazardous materials like mold.

A significant mold infestation is visible in the corner of a room, close to a window, indicating poor ventilation and moisture problems that may affect health stock photo

The Risks of DIY Mold Removal: Why Professional Help is Essential

Removing mold from your home may seem like a straightforward task, but the risks associated with DIY mold removal far outweigh any perceived cost savings. Mold infestations can pose significant threats to both health and property, and improper handling or mitigation can exacerbate these issues. Below, we examine the key reasons why attempting to remove mold on your own can be dangerous and why professional intervention is critical.

Health Risks of DIY Mold Removal

  • Respiratory Issues: Mold spores can become airborne during removal efforts, triggering allergic reactions, asthma attacks, or other respiratory complications.
  • Toxic Exposure: Certain molds, such as black mold (Stachybotrys chartarum), produce mycotoxins that are hazardous when inhaled or touched.
  • Skin and Eye Irritation: Direct contact with mold or its spores can cause rashes, redness, itching, or inflammation.

Without protective gear like respirators, gloves, and goggles that professionals use routinely, these risks increase significantly.

Risk of Spreading Mold

  • Disturbing an infested area releases microscopic spores into the air.
  • Using improper cleaning techniques causes spores to settle in other parts of your house where they may flourish under suitable conditions.
  • Handling materials contaminated with mold without sealing off affected areas properly.

Professionals use specialized containment methods—such as negative air pressure systems—to prevent cross-contamination during cleanup.

Inadequate Tools and Techniques

Mistake Consequence
Using household cleaners like bleach Bleach often fails to fully kill mold roots; growth may return.
Not addressing moisture sources Without fixing underlying moisture issues (leaks/humidity), mold will recur.
Failure to assess hidden infestations Mold behind walls or under floors remains undetected and untreated.

Professionals conduct comprehensive inspections using infrared cameras and moisture meters to locate all affected areas—visible and hidden alike.

Legal and Insurance Considerations

  1. Most insurers require proof that remediation was conducted by certified experts before covering damages.
  2. DIY attempts are often viewed as negligence if they fail to resolve the issue fully or result in further damage.

By hiring licensed professionals who follow industry standards (e.g., IICRC guidelines), you ensure better compliance with insurance requirements while safeguarding your property value.

Why Professional Expertise Matters

  • Safe disposal of contaminated materials per local regulations.
  • Use of industrial-grade cleaning agents designed specifically for microbial removal.
  • Post-remediation testing to confirm all traces of infestation have been eliminated.

Additionally, hiring professionals saves time and effort while reducing long-term costs associated with recurring problems due to incomplete treatment.

Ultimately, while taking a DIY approach might seem appealing initially, it carries significant risks for both health and property integrity. Relying on trained professionals ensures safety and provides peace of mind knowing the job has been done correctly from start to finish.

How to Identify Mold in Your Home and When to Call a Hialeah FL Mold Removal Company

Mold growth can pose significant risks to both your health and the structural integrity of your home. Identifying its early warning signs is essential for taking prompt action. Below are some common indicators of mold presence and effective ways to address them.

Visible Mold Growth

One of the most obvious signs of mold is visible patches on walls, ceilings, or other surfaces. These patches may appear in various colors, such as black, green, white, or even orange. Visible mold often signals a more extensive problem lurking behind walls or under floors.

How to Address Visible Mold: – Small areas (less than 10 square feet) can sometimes be cleaned using soap and water or commercial mold removers. – For larger infestations, contact a professional remediation service to ensure effective removal.

Musty Odors

Persistent musty odors with no identifiable source are often caused by hidden mold growth. This smell is most commonly noticed in basements, bathrooms, or other damp areas.

How to Address Musty Odors: – Ventilate the area by opening windows and using exhaust fans. – Identify potential moisture sources (e.g., leaks or high humidity) and fix them promptly. – Schedule a professional mold inspection if odors persist.

Water Damage or Stains

Water stains on ceilings, walls, or floors can be a precursor to mold growth. Leaky pipes, roof leaks, or flooding incidents provide the perfect conditions for mold to thrive.

How to Handle Water Damage: 1. Dry out the affected area quickly using fans and dehumidifiers. 2. Repair any leaks immediately. 3. Check for hidden mold behind walls or under carpets if water damage is extensive.

Type of Water Damage Potential Risk Action Required
Roof leak Mold on ceilings/walls Patch roof; inspect insulation
Pipe burst Hidden wall/floor damage Repair plumbing; remove wet drywall
Flooding Widespread contamination Professional remediation

Increased Allergy Symptoms

If you notice worsening allergy-like symptoms such as sneezing, coughing, watery eyes, or skin irritation while at home, it may indicate airborne mold spores.

Steps to Mitigate Health Risks: – Use HEPA air purifiers in high-risk areas like bedrooms and living rooms. – Consult with medical professionals if symptoms persist. – Arrange for air quality testing by a certified professional.

Peeling Paint or Wallpaper

Bubbling paint or peeling wallpaper can result from excess moisture trapped within walls—an ideal breeding ground for mold.

Steps to Address Peeling Surfaces: 1. Remove affected paint/wallpaper carefully without spreading spores. 2. Inspect the underlying wall material for signs of active mold growth. 3. Repair moisture issues before repainting or redoing wallpaper.

Condensation Buildup

Excess condensation on windows and pipes suggests high indoor humidity levels that promote mold formation over time.

How to Reduce Condensation: – Use dehumidifiers in damp rooms like basements. – Insulate cold surfaces prone to condensation (e.g., pipes). – Improve ventilation systems throughout your home.

By recognizing these common signs early on and addressing them effectively with proper techniques and tools—or seeking professional help when necessary—you can prevent small problems from becoming costly hazards over time. Taking preventive measures further ensures your living environment remains safe and healthy for all occupants.

The Process of Effective Professional Mold Inspection, Testing, and Remediation Techniques

Mold remediation is a comprehensive process that requires expertise, specialized tools, and a clear understanding of the severity of contamination. A professional approach ensures thorough removal while minimizing the risk of recurrence or health hazards. Below is an outline of the key steps involved in effective professional mold inspection, testing, and remediation techniques.

Step 1: Initial Inspection and Assessment

The first step in managing mold is a detailed inspection by trained professionals. This involves:
Visual Examination: Inspecting areas prone to moisture accumulation such as basements, bathrooms, or attics.
Moisture Mapping: Using tools like infrared cameras and moisture meters to locate hidden water damage or dampness.
Air Quality Testing: Sampling indoor air for elevated spore counts compared to outdoor levels for an accurate assessment.

Professionals assess the size and type of mold infestation to develop an appropriate remediation plan.

Step 2: Mold Testing Procedures

Testing helps identify the type of mold present and its concentration levels. Professionals may use one or more of these methods: – Surface Sampling: Collecting swabs or tape samples from visible mold growth to determine fungal species. – Air Sampling: Measuring airborne spores in different areas to evaluate potential contamination spread. – Bulk Sampling: Analyzing physical materials like drywall or insulation for embedded mold colonies.

Certified laboratories analyze these samples, providing accurate data about the extent and type of mold contamination present.

Testing Method Purpose Example Tools Timeline for Results
Surface Sampling Identifies visible mold Swabs, sticky tapes 24–72 hours
Air Sampling Measures airborne spores Spore traps 3–5 days
Bulk Sampling Tests building materials Bagged material samples Varies

Step 3: Containment Strategies

Preventing further spread during remediation is critical. Experts use containment measures such as: – Sealing off affected areas with plastic sheeting. – Creating negative air pressure using HEPA-filtered machines. – Restricting access to contaminated zones until remediation is complete.

These precautions ensure that unaffected parts of your home remain safe from spores during cleanup activities.

Step 4: Mold Removal Techniques

Professional removal focuses on eliminating both visible growth and underlying causes: 1. Damaged Material Removal: Porous materials like drywall or carpets often need replacement if heavily contaminated. 2. HEPA Vacuuming: Vacuuming surfaces with high-efficiency particulate air (HEPA) filters captures microscopic spores. 3. Antimicrobial Treatments: Applying approved cleaning agents eliminates residual mold colonies on nonporous surfaces. 4. Dry Ice Blasting (if applicable): For structural components like wood beams where traditional cleaning methods are less effective.

Step 5: Drying and Dehumidification

Addressing moisture issues is critical to preventing regrowth: – Industrial dehumidifiers are used to reduce indoor humidity levels below 50%. – Structural drying techniques ensure all previously damp areas are thoroughly dried before repairs begin.

Step 6: Post-remediation Verification

After completing remediation efforts, professionals carry out verification steps: – Conduct clearance testing to confirm that spore levels have returned to normal ranges. – Perform follow-up inspections ensuring no moisture sources remain unaddressed.

Proper documentation detailing findings, processes followed, and test results provides homeowners with peace of mind regarding their property’s safety.

By following these meticulous steps performed by trained professionals, you can significantly reduce health risks while restoring your property’s integrity effectively.